Sunday, September 29, 2013

Skate Deck Wall Mount


One part of skateboarding that I'm good at is appreciating the artwork. One of my talented sisters produced a deck and I wanted to mount it on my wall with a little style.


The idea is to have the board mounted out from the wall far enough that the curvature of the board doesn't touch the wall, but have it secure enough that the board won't rock (and it can support a floating frame).


Preliminary Work


The general idea

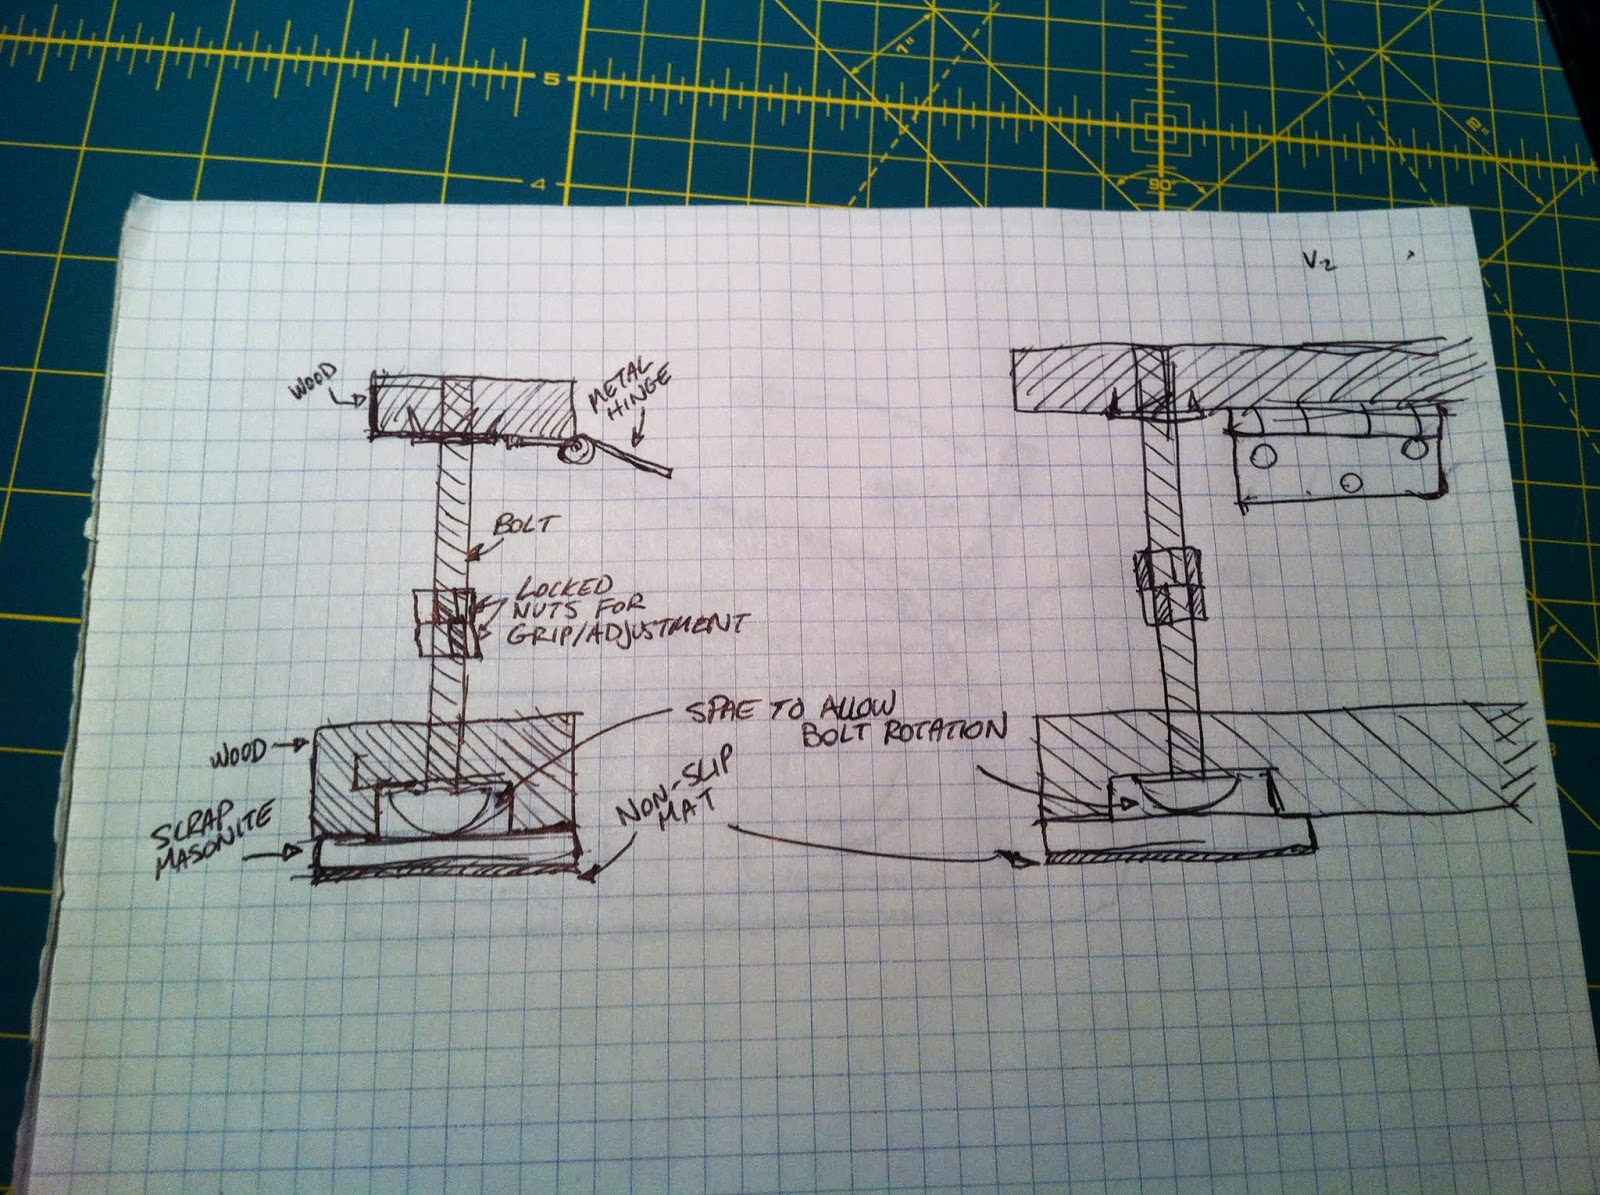
I decided to go with a modified french cleat. I staggered the cleats to ensure I had enough surface area to support the board from only the top two holes without losing stability

Revisions were necessary

The frame mount would also be attached at the top of the removable block, and would support the frame from the top-center position.


Materials


> Wood
> 2 square bend hooks
> A length of aluminum flat about 11" long
> Self leveling frame brackets (the same width as the flat)
> 2", 3" screws
> clamps, saw, grinder, drill, glue, tape measure, coffee


I'll make it work


The Process


The Mount


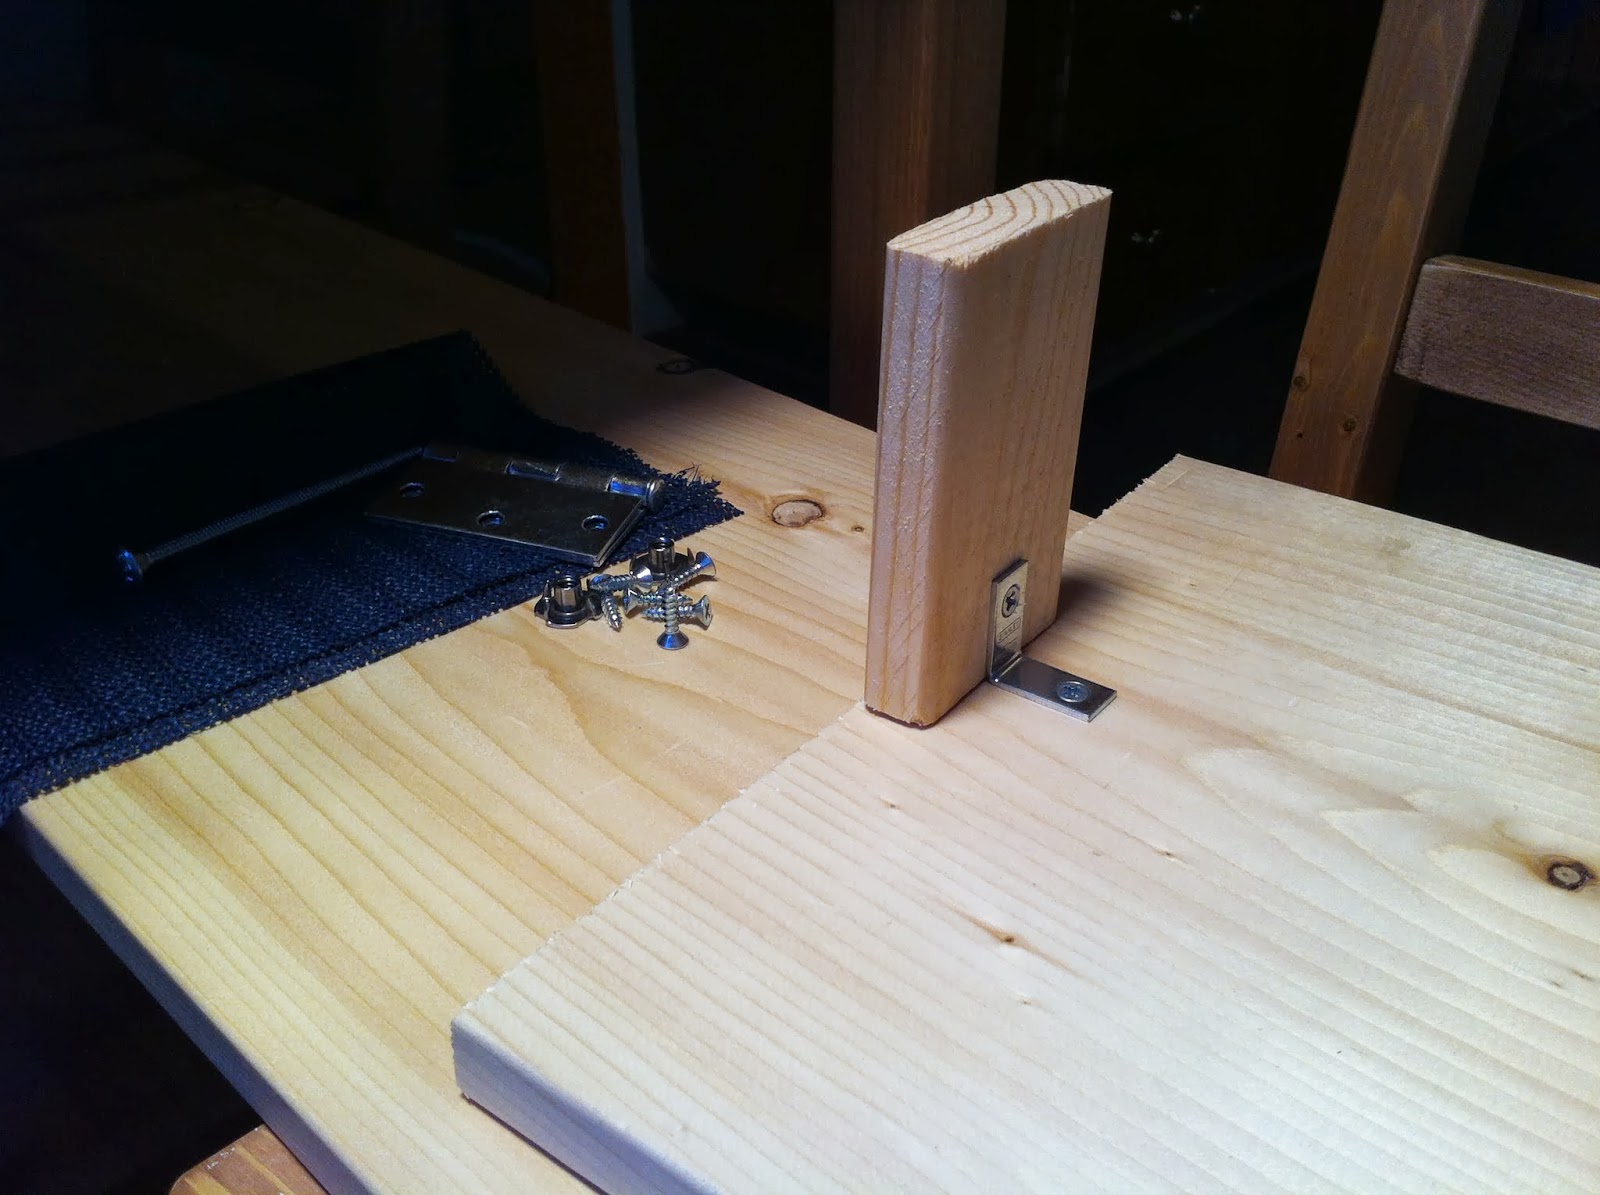
I offset two boards and cut them at about a 30 degrees, squared them up and screwed them together, adding another block for the mounting face.


I used a grinder to cut the hooks to the thickness of the board, beveled the edge to remove the sharp bits,  and screwed them into pilot holes in the mount face.


I added some non-slip matting for cushioning and... well... to stop things from slipping.


2 more screws, and it's up on the wall.
It's on the level
Phase one, complete


The Frame


I bent the aluminum flat into the frame support, drilled a hole in the bottom, and fastened it to the removable mounting block.


I used some primed moulding to glue a frame together. I used some filler to fix the seams and painted it. Add frame bracket to taste.


The Product


Add the board...
and a cherry on top.


Thursday, September 19, 2013

Hanging Light Fixture Hack

My dining room light fixture left something to be desired.
It was a generic 2 bulb fixture with a glass cover. Since my kitchen table doubles as a work table, I wanted to get some more direct light.

how things used to be


Preliminary Work


The basic idea was to use the existing mount and add my own light in the least ugly way possible.
I figured I could use some thick wire to bend a frame with and hang the fixture from. I would need to use the available power, as well.

like a warm power cable hug

I thought it would be nice if the weight of the light itself helped suspend it above the table. By looping the wire around in a tight 1.5 turn helix, the added weight would enlongate the helix, decreasing the radius and adding pressure to the coiled wire held within!


Materials


Only a few simple items for this project. 
> Coat hanger
> Industrial hanging pot light 
> Light fixture to AC power adapter
> Pliers and a length of dowel or broom handle to bend the wire


The Process


Only a few steps to realize my dreams of concentrated illumination.
Placing the original threaded support rod a small loop at the top of the wire frame, I screwed the fitting reasonably tight.

Screw in the adapter, plug in the light, coil and hang the fixture.

done.


The Product


A nice spot to sit down to work!
BONUS: I believe I mentioned it was a 2 bulb fixture! with an extra adapter, you can plug in an extension cord to have power close by while you work! Just remember to have it suspended away from the light!


Saturday, September 14, 2013

Custom Wall Shelving Part 2: The Projector Mount

After getting the shelves up, the next step is getting that digital projector to sit majestically atop the upper shelf.

After purchacing the projector (the BenQ W1070, in this case), I learned that the 'Lens Shift' adjustment is really only viable if your projector is on a ceiling mount. Seeing as I intend to use my projector right side up on a high shelf, I needed a way to angle the image downward. The simple solution is to angle the projector downwards.

Preliminary Work

My idea was to use 2 threaded rods to suspend a wooden board, so you can adjust the tilt as well as the angle so it would be easy to adjust the image on my wall.


the general idea

I was hoping to find some generic plastic feet with  a thread, but it was easier to find a bolt of the right length, so plans changed slightly.
The bolts alone wouldn't be stable enough, so I added a piece of wood as a base.


much more stable. drawn after the fact.*

a small piece of wood in the front to ease nerves
* I made a few revisions as I went.


Materials

I had a bunch of leftover wood from the shelving project, so I just bought some hardware.

leftover wood, drawer liner, and hardware
> wood. I had some. > 2x 6 inch bolts > hinge > tea nuts > small angle bracket >  drawer liner* > small piece of masonite or some thin durable material*


The Process


I cut the wood I needed to size. One base, one piece to secure the front of the projector, and two for the back and footing.

a piece of wood in the shape of a square
I secured a the front piece with the angle bracket, and attached the hinge underneath the middle of the opposite side.


safety belt


I drilled a few pilot holes in the footing to allow the bolts enough room to freely turn in two pieces that were the same size for the bolts to go in.


safety first

For the back, I then hammered in the tea nuts and attached it to the hinge connected to the base.
On the footing piece, I used a chisel to cut a square hole around the pilot hole that was deeper than the head of the bolt. After inserting the bolt, I covered the holes by gluing a square of masonite pegboard over top and covering them with non-slip drawer liner to act as the feet.


I was impatient
I added two nuts onto each bolt and locked them together part way down so I could grip the bolt to adjust each side individually.


The Product

Works like a charm!


I'm still thinking about the cable situation


I'll think of something...